Making your own notebook can be a fun and rewarding project. You can create a notebook that suits your style and needs in just a few simple steps.
Whether you want a pocket-sized notepad for quick notes or a more substantial journal, this guide will help you through the process.
Comprehensive Table of Contents for Your Custom Notebooks Guide
- Materials and Tools Required
- Designing Your Notebook
- Assembling the Notebook
- Personalization and Customization
- Using Your Handmade Notebook
- Care and Maintenance
- Frequently Asked Questions
- What materials are needed to create a homemade notebook?
- What are the steps involved in assembling a notebook from scratch?
- How can you make a durable cover for a DIY notebook?
- What techniques can be used to bind the pages of a handmade notebook?
- How can I create a notebook that is suitable for school use?
- What is the process for crafting a notebook with a high page count?
Gathering basic materials is the first step. You will need sheets of paper, a cover, and a way to bind them together, like staples or glue.
With a few tools like scissors and a ruler, you can craft something unique that reflects your personality.
As you explore the various methods to make notebooks, you’ll discover easy techniques that require minimal supplies. From using loose paper to creating a spiral-bound design, the possibilities are endless. This DIY project allows you to unleash your creativity while crafting something practical for everyday use.
Materials and Tools Required
Creating a homemade notebook requires careful selection of materials and tools. The choices you make impact the notebook’s quality and look. Here’s what you need to consider.
Choosing the Right Paper
For the pages of your notebook, printer paper is a popular choice. It is readily available and comes in different weights.
A standard weight of 20 lb is often great for writing. If you prefer a thicker feel, consider using cardstock, which provides durability.
Measure your desired page size before cutting. For example, if you want an A5 notebook, cut the sheets to 8.5″ x 5.5″.
Use a bone folder to create clean folds when you make each sheet. This ensures a neat edge and adds to the notebook’s overall appearance.
Make sure to stack the sheets neatly. This will help you align them properly during binding.
Selecting a Durable Cover
The cover is important for protecting your pages and giving your notebook a finished look. You can use cardstock again for a thicker, more durable cover.
Alternatively, you might opt for a lightweight cardboard, which adds sturdiness.
Consider your design options, too. Decorative paper, fabric, or even recycled materials can work well. If you use fancy materials, be sure they are rigid enough to support the notebook spine.
After cutting your cover, try to match its size with your folded sheets. This will ensure a professional look.
Gathering Binding Materials
Binding materials are essential for keeping your pages together. Binder clips can be used to hold your sheets while you work.
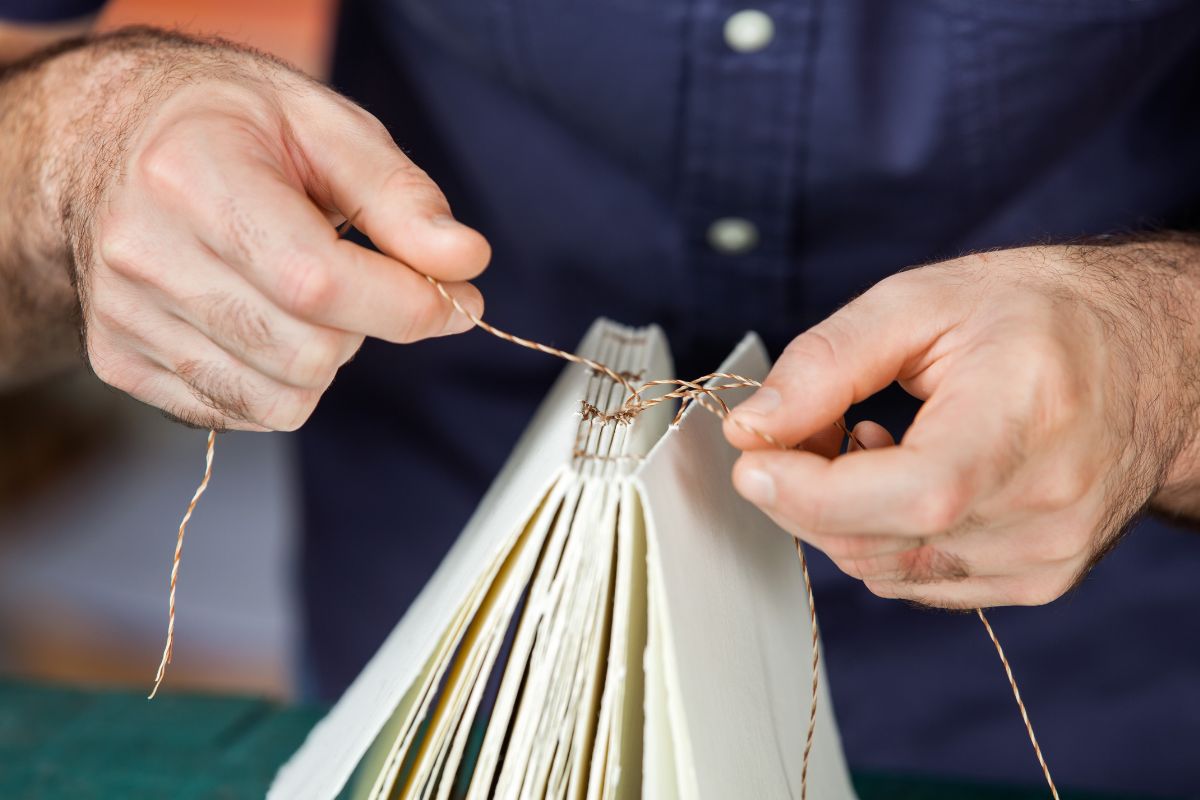
Once you are ready to bind, consider options like an awl for making holes in the spine, or a sewing machine for a more permanent binding method.
If you prefer a simpler method, you can use book rings or even staples. For a no-sew option, PVA glue can be used to attach the pages to your cover.
Each binding method has its charm, so choose based on your skills and desired notebook style.
Finding Additional Tools
In addition to basic materials, having the right tools makes the process easier. A cutting mat protects your surfaces when cutting paper.
A metal ruler ensures straight cuts, which is especially important for your notebook’s edges.
You’ll also need a craft knife for precise cuts. If you plan to sew your spine, gather a needle and thread, or use a sewing machine for faster assembly.
Lastly, keep a pencil on hand for marking measurements. Proper tools can significantly enhance your notebook-making experience.
Designing Your Notebook
| Step | Materials Needed | Instructions |
|---|---|---|
| 1. Gather Materials | Paper sheets (A4 or any size), Cardboard or thick paper (for cover), Glue, Stapler or thread, Scissors, Ruler, Decorative items (stickers, fabric, etc.) | Collect all the required materials before starting. |
| 2. Cut the Pages | Plain or ruled paper | Cut the paper to your preferred size for the notebook. Ensure all sheets are of the same size. |
| 3. Prepare the Cover | Cardboard, Decorative paper, Glue, Scissors | Cut the cover slightly larger than the inner pages. Decorate as desired. |
| 4. Arrange the Pages | Paper sheets, Cover | Stack the pages neatly inside the cover, making sure they align properly. |
| 5. Bind the Notebook | Stapler, Thread & needle, Glue | Choose a binding method: Stapling (use a strong stapler along the edge), Thread Binding (stitch along the spine), or Glue Binding (apply glue on the spine and press tightly). |
| 6. Trim the Edges | Scissors, Ruler | If necessary, trim the edges to make them even. |
| 7. Add Finishing Touches | Stickers, Fabric, Label | Decorate the cover with stickers, labels, or fabric for a personalized look. |
| 8. Let It Dry | Drying space | If you used glue, allow the notebook to dry completely before use. |
Creating a visually appealing notebook starts with customizing the cover and adding decorative elements. These steps allow you to express your style and make your notebook unique.
Customizing the Cover
Your notebook cover is the first thing people see. You can personalize it in many ways.
Consider using scrapbook paper to give your cover texture and design variations. Choose colors and patterns that reflect your personality.
Materials you might use:
- Plain cardstock: For a simple look.
- Printed scrapbook paper: For vibrant designs.
- Photos or illustrations: To add a personal touch.
To attach the cover, secure it around the edges of the notebook. Double-sided tape or glue works well. If you want a more durable option, consider using a clear cover to protect the design.
Decorative Elements
Once your cover is set, adding decorative elements makes it more inviting. You can use stickers, washi tape, or stamps. These items can be found on sites like Etsy or in craft stores.
Think about the following decorative options:
- Stickers: Personalize sections with quotes or images.
- Washi tape: Frame your notebook edges or create borders.
- Hand lettering: Add titles and dates for organization.
By mixing and matching these elements, you can create a notebook that’s not only functional but also a reflection of your creativity. Remember to keep the design cohesive to ensure it all comes together smoothly.
Assembling the Notebook

Assembling your notebook involves several important steps, including cutting and folding the paper, choosing binding techniques, and securing the spine. These steps ensure that your notebook is not only functional but also looks great.
Cutting and Folding the Paper
Start by cutting your printer paper to your desired size. A common size is 8.5 x 11 inches, but you can choose any size you prefer. Use a metal ruler and craft knife for clean, straight cuts.
Once all your pages are cut, stack them neatly. Fold each stack in half carefully. Use a bone folder to create a sharp crease along the fold. This crease will help the pages sit flat.
Make sure the edges are aligned. You can use binder clips to hold the folded pages together. This keeps everything in place while you work on binding.
Binding Techniques
Binding is crucial for keeping your notebook pages secure. There are several methods you can choose from:
Sewing: Use a sewing machine for a strong bind. Punch holes through the spine with an awl, then sew the pages together.
Stapling: For a quick option, use a long-arm stapler. Place staples along the fold of the spine.
Book rings: If you want a removable option, punch holes along the spine and add book rings. This makes it easy to rearrange pages.
Choose the method that suits your notebook style best.
Securing the Spine
After binding your pages, it’s time to secure the spine. Cover it with a layer of cardstock or fabric for added durability. This layer can be cut to fit the size of your notebook.
Use strong glue or tape to attach the cover to the spine. If you prefer a more polished look, consider adding a strip of decorative tape along the spine.
Make sure everything is aligned properly. Once secured, your notebook should withstand daily use with ease.
Personalization and Customization
Making your notebook stand out can be a fun and rewarding process. Personalization allows you to tailor your notebook to your specific needs. You can create a unique book that reflects your personality while serving its purpose well. Here are some ways to customize your homemade notebook.
Creating Sections and Dividers
Start by deciding how you want to organize your notebook. Using different sections can help you access information easily. You can create dividers from cardstock, which is sturdy and appealing.
To make dividers:
- Cut the cardstock into the desired size.
- Label each section clearly using bold markers or stickers.
- Consider color coding sections to help sort topics visually.
This organization allows you to separate categories like notes, sketches, and planning, making your notebook more functional.
Adding Unique Touches
Feel free to express your creativity through unique touches. You can design the cover with your art or printed images, giving your notebook a personal flair.
Consider these options:
- Add stickers or washi tape along the edges or corners for decoration.
- Use decorative paper for the inner pages.
- Incorporate quotes or affirmations on pages to inspire you as you write.
These elements enhance your notebook’s aesthetic and make the writing experience more enjoyable.
Tips for a Professional Finish
If you want your notebook to look polished, focus on the details. Check the alignment of the pages and ensure that everything is neat.
Here are practical tips:
- Bind your notebook securely using a simple binding technique, such as staples or punched holes with ribbon.
- Use high-quality materials to prevent wear and ensure durability. Cardstock is a good choice for covers and dividers.
- Review your layout before committing to final designs or bindings.
Paying attention to these details will give your notebook a professional appearance, making it something you’ll be proud to carry.
Using Your Handmade Notebook
| Purpose | Usage Ideas | Tips for Best Use |
|---|---|---|
| Journaling | Write daily thoughts, reflections, or gratitude lists. | Use different ink colors or stickers to make entries visually appealing. |
| Sketching & Doodling | Draw, sketch, or create designs. | Use blank pages or lightly lined sheets for better creativity. |
| To-Do Lists & Planning | Write daily tasks, goals, or schedules. | Use checkboxes or bullet points to keep track of completed tasks. |
| Study Notes | Summarize key concepts, formulas, or vocabulary. | Highlight important points with markers for easy review. |
| Budget & Expense Tracking | Record daily expenses and savings goals. | Keep a separate section for tracking monthly finances. |
| Creative Writing | Write stories, poems, or brainstorming ideas. | Divide sections for drafts and final versions. |
| Scrapbooking & Memories | Paste photos, tickets, or memorable keepsakes. | Use washi tape or glue for a neat presentation. |
| Recipe Collection | Note down favorite recipes and cooking tips. | Organize by categories (breakfast, lunch, dinner, desserts). |
| Fitness & Health Tracking | Track workouts, meal plans, or hydration levels. | Add dates to monitor progress over time. |
| Language Learning | Write new vocabulary, grammar rules, and translations. | Include example sentences and pronunciation guides. |
Your handmade notebook is ready for use. You can personalize it in many ways to fit your needs.
1. Types of Use:
- Journaling: Write daily entries or thoughts.
- Note-taking: Use it for school or meetings.
- Sketching: Add drawings or doodles.
2. Customization:
- Decorate the Cover: Use stickers, paint, or washi tape.
- Color Code Pages: Use different colors for sections.
3. Organizing:
- Section Dividers: Create dividers to separate topics.
- Table of Contents: List what’s in your notebook at the front.
4. Care Tips:
- Store Safely: Keep your notebook in a dry place.
- Avoid Overstuffing: Don’t add too many pages at once to maintain structure.
Your homemade notebooks can reflect your style and help organize your thoughts. Enjoy your creativity!
Care and Maintenance

To keep your notebook in good shape, follow these simple tips.
Store Properly: When not in use, keep your notebook in a cool, dry place. Avoid leaving it in hot or damp environments.
Use Quality Materials: Choose cardstock for pages. It provides durability and prevents ink from bleeding through.
Secure with Binder Clips: Use binder clips to hold your pages together. This helps prevent pages from tearing and keeps everything organized.
Handle with Care: Always handle your notebook gently. Avoid pulling too hard on the pages or the binding.
Clean Regularly: Wipe the cover with a soft, dry cloth to remove dust. If your notebook gets dirty, use a damp cloth with a mild soap. Keep it away from liquids to avoid damage.
Check Binding: Inspect the binding regularly for any signs of wear. If you notice loose pages, consider reinforcing them with tape or replacing the binding.
Avoid Overfilling: Don’t stuff your notebook with too many pages. This can cause strain on the binding and lead to breakage.
Frequently Asked Questions
You might have some questions as you start making your own notebooks. Here are answers to common queries about materials, steps, cover durability, binding techniques, school suitability, and crafting notebooks with many pages.
What materials are needed to create a homemade notebook?
To make a notebook, you’ll need some basic materials. Gather paper for the pages, a sturdy cover material like cardstock or cardboard, glue, scissors, and binding tools such as staples or a hole punch. Additional supplies may include a ruler and a craft knife for precise cutting.
What are the steps involved in assembling a notebook from scratch?
Start by cutting your paper to the desired size.
Prepare your cover using the same size as the pages.
Stack the pages neatly and place the cover around them.
Use glue, staples, or your chosen binding method to secure everything together.
Finally, press down to ensure that the pages stay in place.
How can you make a durable cover for a DIY notebook?
For a strong cover, use thick cardstock or recycled cardboard.
Cut it to the same size as the pages.
You can also laminate the cover to resist wear and tear.
Adding decorative paper or fabric can enhance the look while keeping the cover durable.
What techniques can be used to bind the pages of a handmade notebook?
You can bind your notebook using several methods.
Staples work well for thin notebooks, while larger ones may need a more secure method like stitching.
Another option is to punch holes along the spine and use ribbon or twine to thread through, keeping the pages tightly together.
How can I create a notebook that is suitable for school use?
To make a school-friendly notebook, check your school’s requirements.
Use double-lined paper if needed.
Make sure the size fits in a backpack easily, and ensure the cover is practical yet attractive.
Consider adding a pocket inside for storing loose papers.
What is the process for crafting a notebook with a high page count?
When making a notebook with many pages, consider weight and thickness. Use thinner paper to save space while allowing more sheets.
Bind the notebook securely, possibly with multiple stitches or a strong glue. Ensure that the spine can handle the extra weight without breaking.


